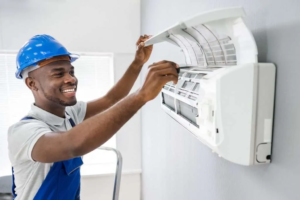
Troubleshooting Tips for Air Conditioning Repair
Addressing air conditioning issues promptly helps extend the lifespan of the equipment. Neglected problems can escalate into more serious issues that may require system replacement.
Troubleshooting techniques used by skilled repair technicians help to identify the root cause of the AC issue. This may include checking refrigerant levels or inspecting wiring connections. Contact Air Conditioning Repair Orlando now!
Your thermostat is the brain of your AC system, and when it isn’t working properly, it can lead to poor temperature control and inefficiency throughout the home. Luckily, there are some simple troubleshooting tips you can try at home to resolve many common thermostat problems before calling in professional AC services.
1. Check the Power Source
If your thermostat doesn’t turn on, it may be a sign of a dead battery. Replacing the batteries is a quick and easy fix that can restore your thermostat to operation. You should also check your circuit breaker to ensure that it isn’t tripped.
2. Clean the Sensors
Over time, dirt and lint can build up on your thermostat’s sensors, interfering with their ability to accurately measure temperature. To keep your thermostat functioning properly, you should regularly clean it by removing the cover and gently brushing away any dust or debris.
3. Adjust the Anticipator
In mechanical thermostats, the anticipator is a flat metal pointer on a disc that controls how frequently the HVAC system cycles on and off. If the anticipator is moving too far from the word “longer” or too close to the word “shorter” on the disc, you can correct it by adjusting it with a screwdriver. With the power off, carefully remove the cover and examine the anticipator’s mechanical and electrical components. If the wires are loose or disconnected, carefully tighten them or replace them.
4. Recalibrate the Sensors
Your thermostat’s temperature sensors help your system maintain consistent indoor temperatures by detecting changes in room air. If the sensors aren’t calibrated correctly, they can’t provide accurate readings and your system will be less efficient. To prevent this problem, you should regularly check your sensors and recalibrate them according to the manufacturer’s instructions.
5. Recheck the Settings
If your thermostat isn’t reaching the desired temperature, you might need to change the setting. Check your manual to see how to do this. If you’re having trouble locating the manual, contact your local HVAC service to assist you.
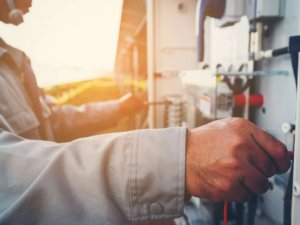
Electrical Issues
Electrical issues can be a serious problem and often require professional repair. Some issues are minor, like changing a light bulb or resetting a tripped circuit breaker, while others are more significant and could lead to serious damage or even fire. Identifying and addressing these problems early on can save you time, money, and stress down the road.
One of the most common electrical issues is a power surge. This can occur for a number of reasons including bad wiring, lightning strikes, and cheap electronics. Surges last for a split second but can cause damage to equipment and reduce its lifespan. Usually, the best way to avoid this issue is to use quality, high-quality devices and unplug them when not in use.
Another sign of an electrical problem is if your lights are flickering. This can be caused by many things including a loose light bulb or faulty fixture. If the problem persists, you may want to consider switching to LED bulbs that consume less power and won’t flicker as much.
If you notice a burning smell, it’s important to turn off the power at the circuit breaker box and contact a qualified electrician immediately. This is a sign of a serious problem that could result in an electrical fire.
Electrical fires can be extremely dangerous and may result in severe damage to your home. They can also be difficult and expensive to fix.
Keeping your house free of rodents, pets, and amateur handymen is a good way to prevent these types of problems from occurring. Also, using specialised clips to hold wires in place is a great way to keep them safe from chewing or tripping.
It’s also important to check your fuses and capacitors regularly to make sure they’re not failing. These are essential components that regulate the flow of electricity through your household appliances. Failing fuses or capacitors can cause your appliances to overheat and stop working. Failing fuses and capacitors can also be a sign of poor wiring that needs to be fixed. In some cases, replacing these parts is the best option.
Evaporator Coil Issues
A clogged evaporator coil can be a major problem for your AC. It’s where the refrigerant absorbs heat from your home, and without a clean, functioning coil, your air conditioning will take longer to cool down and produce less cooled air than it should.
Clogged coils can be caused by a number of issues, but the most common one is dirt and grime. Dirty coils are easily cleaned by a professional HVAC technician, who can spray a cleaning solution down the coil and rinse it off to make it like new again.
The other most common issue that can affect a coil is corrosion. Corrosion happens when chemical sprays from your household cleaning products mix with the condensation on your evaporator coil and eat away at its metal surface, creating tiny leaks. You can usually tell that your evaporator coil is leaking if you see an oily residue on or around the coil.
If the evaporator coil starts to corrode, it’s going to start losing its ability to absorb heat and will eventually freeze over. This will cause your AC to blow out warm air rather than cool air, and it’s something that needs to be addressed as soon as possible by a professional HVAC technician.
A cooling system with a bad evaporator coil will need to work overtime to maintain a comfortable indoor temperature, and this extra strain is often reflected on your energy bills. If you notice a significant increase in your monthly energy bills without any other explanation, it could be time to call an HVAC professional to look at your evaporator coil.
Another telltale sign of a faulty evaporator coil is loud banging or scraping noises coming from your vents. This is a clear sign that the coil is in need of repair, and you should contact a HVAC professional as soon as possible to schedule a service appointment. Having your coils repaired as soon as possible will prevent more serious problems from developing down the line that may require expensive equipment replacement. Having regular maintenance services performed will also help to prolong the life of your evaporator coil and reduce the need for repairs in the future.
Fan Issues
When the fan isn’t spinning, it may be a sign of a more serious issue. Before you call an HVAC technician to come out and look at your AC system, it’s a good idea to try and figure out what might be going on. This will help you explain the problem to your technician when they arrive.
If your fan doesn’t spin at all and the compressor is humming, it might be an electrical problem. Start by checking your circuit breaker to see if it has tripped. If it has, you will need to reset it and turn the system back on. Then, you should check to make sure that your thermostat is set for cooling. If it’s not, it will shut the system down and keep your fan from running.
Another possible cause of a non-spinning fan is a failed capacitor. The capacitor is what jump-starts the fan motor, so it’s important that it is working correctly. If you suspect that the capacitor is broken, there are several things that can be done to repair it. First, you will need to locate the capacitor, which is usually located in the outdoor unit. It will look like a cylindrical object and have wires coming out of it. Once you have found it, you will need to discharge it safely by using an insulated screwdriver. You can then replace it with a new one, which should fix your fan.
Finally, you will need to inspect the fan blades for any debris or obstructed areas that might be causing it not to spin. You can also check for loose or broken wires that could prevent the fan from getting the electric current it needs to spin. This is a job for an HVAC professional, as it can be dangerous to handle electrical components without the proper training.
It’s always a good idea to contact an experienced HVAC technician when you suspect that your air conditioner is experiencing any kind of issue. They will be able to diagnose the problem and find the most cost-effective solution.